In this tutorial we are going to see how to create electric beams in Photoshop from scratch. These electric beams will be very much useful in creating any music or party posters like this one.
Preview
You might like our basic photoshop tutorial “Create Vignette Photo Effect in Photoshop“
[xyz-ihs snippet=”Backfill”]
Step 1: Open the document
Open a new document with black background of any size and make sure that the foreground and background colours are set to white and black respectively.
Step 2: Drawing the electric beams
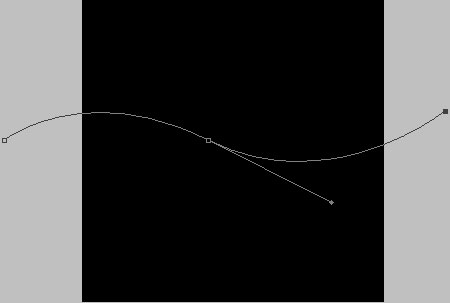
Now choose a circular basic brush of hardness 0% and diameter 1-3 pox whichever size you desire. Now take the pen tool and draw a curve something similar to this or in any way you like in a new layer but make sure that the curve exceeds the border of the document.
Step 3: Stroking the path
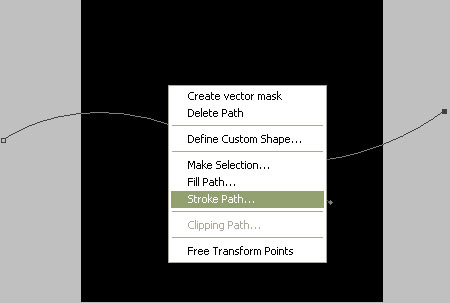
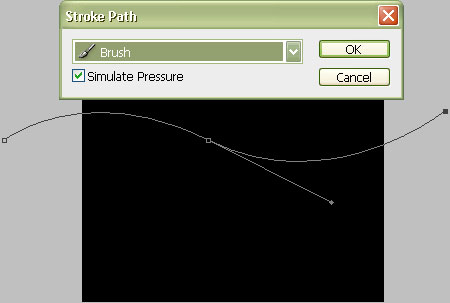
Now with the pen tool still selected right click and choose stroke path from the pop up menu. Now a dialog box opens up and choose brush from the drop down box in the dialog box and make sure that the simulate pressure check box is checked. After that press esc 2 times.
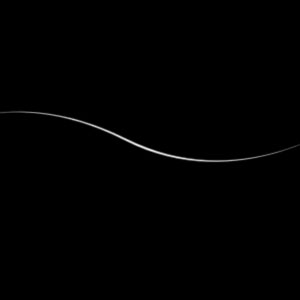
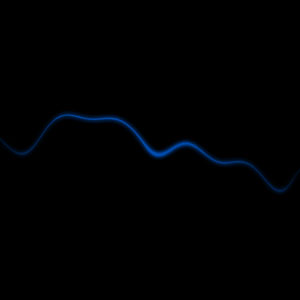
Now you must be getting something like this.
Step 4: Applying layer styles
Apply outer glow and inner glow with any colour you desire with its default values but make sure that you apply the same colour for both the layer styles and now reduce the fill to 0%. Now you must get something like this.
[xyz-ihs snippet=”Backfill”]
Step 5: Distort the stroke
Now got Filter-> Distort-> Wave and give any value you desire but give very less values so that it gives a good, aesthetic and realistic look and doesn’t looks more artificial. You must get some thing like this.
Step 6: Creating another electric beam
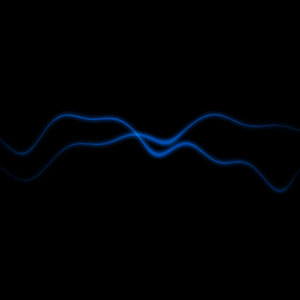
Now repeat steps 2 to 5 one more time to create another electric beam. This is how you will get the final output.
[xyz-ihs snippet=”Backfill”]
Hope you like this Photoshop Tutorials and kindly share this tutorial with others.





Nice tip. Another cool method to create such electric beams would be to use Difference clouds..
Thanks for the tut 🙂
.-= Richie´s latest blog ..The spectacular world of Time Lapse Photography =-.
Thanks Richie, Creating electric beams using difference clouds is already available as tutorial that’s why i tried this method.
Thanks Teylor,
I ll post more effects like this in future keep logged in and stay intouch with animhut.
Hmmm… I can’t seem to get “Stroke Path…” when I right-click on the line. It’s grayed out. Also, in step 1, do you mean set the foreground to black and the background to white? Because when I do it the other way around I get a white fill. Are you using the pen tool on a different setting as mine? Are you doing a black fill?
Okay, got it working. There’s still some things that I’m not understanding how they work exactly. I’ll have to try this a few times over. Thanks for the tutorial. 🙂
.-= Travis Ulrich´s latest blog ..Why Blog? =-.
Happy that you got it. Stay in touch with animhut for more tutorials, freebies, resources and giveaways. Always happy to help you.
This has nothing to do with bg and fg color. Make sure that the pen tool is still selected whrn you right click.
Neat trick. Thanks for the clear instructions.
.-= Marine´s latest undefined ..Response cached until Tue 22 @ 20:21 GMT (Refreshes in 23.96 Hours) =-.
Thanks Marine, for the comments. Stay in touch with animhut for more nice tips and tricks like this.
You can do it as many number of times you want but it is better to stop with 1to 3 times else it looks too messy.
this is great, will help me a lot to design a poster to my college tech fest. Thanks 🙂
.-= Gagan´s latest blog ..What Basically Is A Search Engine Optimized Theme =-.
Sure Gagan, I too was using this technique for creating posters but that was once upon a time when i was an amateur. But today in designing posters i use lot of different design concepts which will be posted as tutorials in future so please stay in touch with animhut for more…
Really simple to do, but so effective. Very useful technique.
The result looks fantastic and the steps are easy to follow. This one is my favorite!
i am stuck with the 3rd step..i can apply stroke path..but not getting the output after applying Brush with stimlulate pressure option!! 🙁