This is my first tutorial in photoshop, and I done this poster for my semester project. Here i am going to show you “War Movie Poster” in very simple methods. And this tutorial is for basic one.(just now finished photoshop and learning new techniques daily). Ill be posting some new tutorials soon.
Step: 1
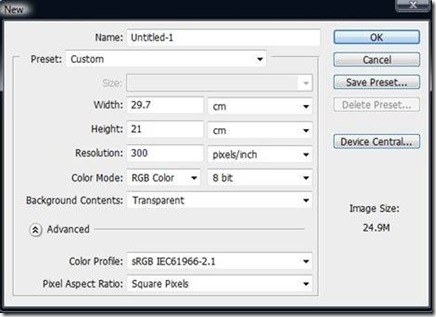
Open a Document in Photoshop(recommend Cs2 or Cs3). File->New(Ctrl+N) give the value:
|
.Now,select the foreground color and value: 202020, fill it(Alt+backspace).
Step: 2
Create a new layer [ Ctrl+Shift+N ] here we add some backgrounds i found this sxc.hu(link)
Please remove the birds using clone tool(S),by pressing[Alt+ Left Mouse click] near by area and brush with soft brush.
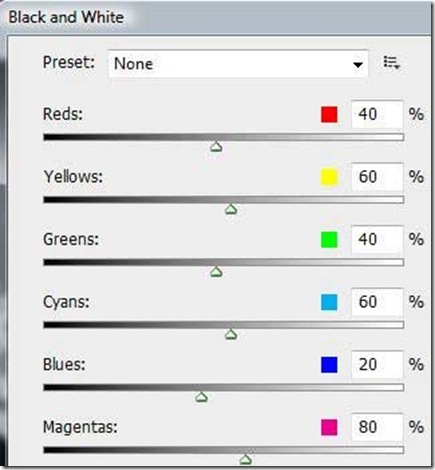
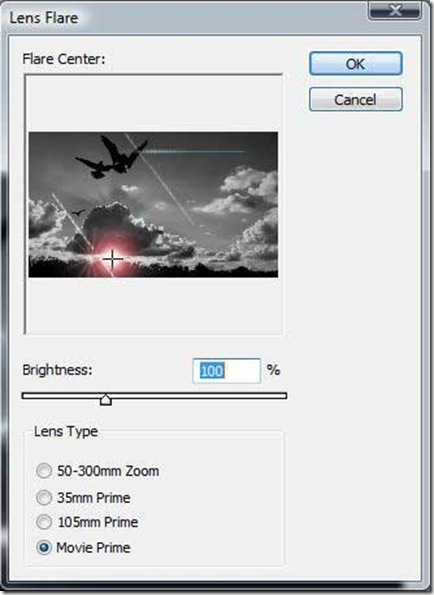
Now select Image->Adjustments->B/W [Alt+Ctrl+Shift->B] “ note: Cs2 USER use DESATURATED(Shift+CTRL+U)” and then use Lens flare [Filter->Render->Lens flare ] to the clouds,the effect will look good at final stage.{Lens flare is optional}
found in cs3 or above*
Lens flare: Use Brightness:100%, lens type: Movie Prime. You always play with settings/values
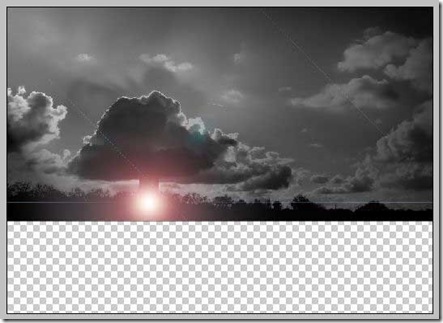
Now Move image to top position of same layer
Step:3
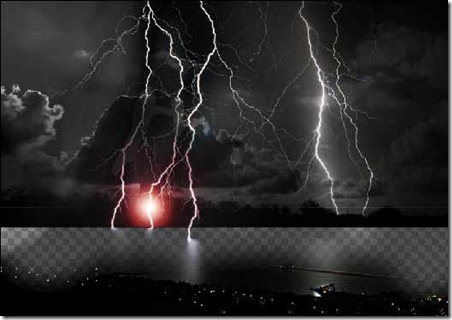
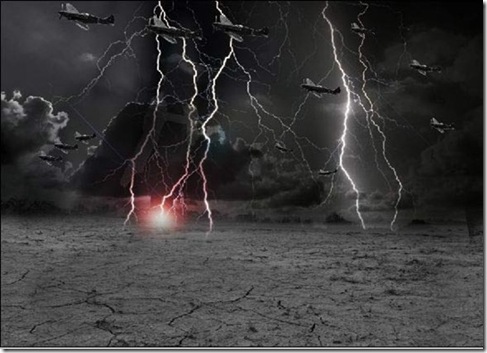
Create a new layer(thunder) above all,Now we are going to add some thunder bolt images. I have given edited image HERE. Just duplicate the image once and both image “Layer mode” change to “Overlay”. ” My suggestion: use layer mask to hide the unwanted parts using soft brush”Always have the practices of grouping similar images & name it. the image may not looks so good right?, Dont worry the next image will make it good
Step:4
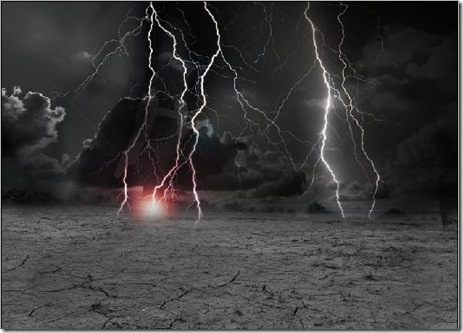
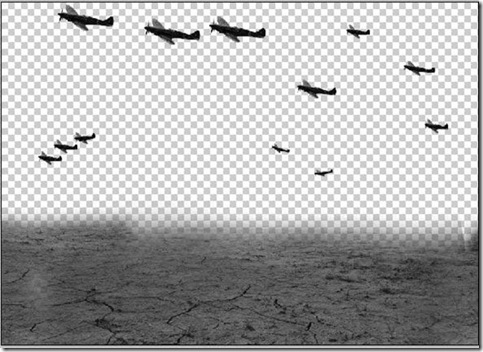
Create a new layer above all layer. Now place the ground image in bottom position of the same layer , once again i gave you the edited image in B/w mode(link).
Name the layer ‘Ground’.now it looks better.
Step:5
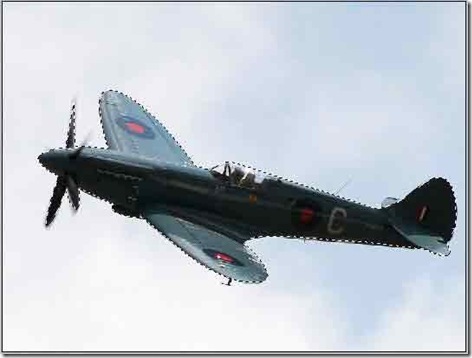
Now our background is set, Create a NEW LAYER above the thunder layer. we move on to missionary, I got this image from Sxc.hu.Now use the Pen tool(P) to select the plane
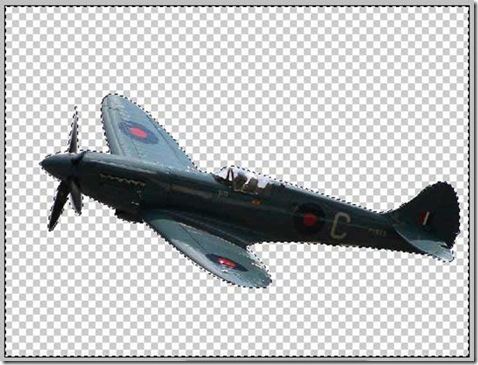
and after selecting whole plane,From menu: Select-> Inverse[Ctrl+Shift+I] and DELETE as shown below and desaturate it. Name layer”plane1” and duplicate two times and resize it.
Place the image one behind one,like this, now follow same step once again-(duplicate plane) for how many times you needed. For me 12 times duplicated and resized,placed in many places.Preview( i hide clouds and thunder layer to see clearly). enable them later.
now enable the previous layer,the image should look like this:
Step:6
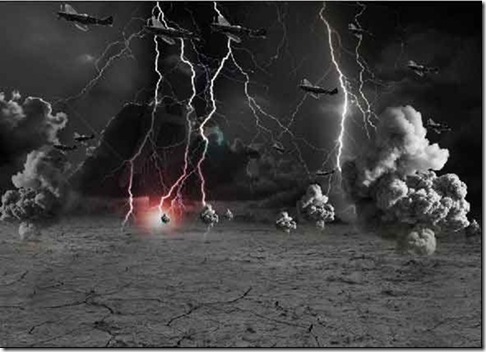
Create new layer above plane layer.Add Explosion smoke to the Image Link.
Desaturated edited image. And place wherever you want, but make a copy of 9times as i did.[Tip:use volcano eruption] .Apply the same effect,(i.e)pen tool to select the object,delete the unwanted space and desaturate.
Step:7
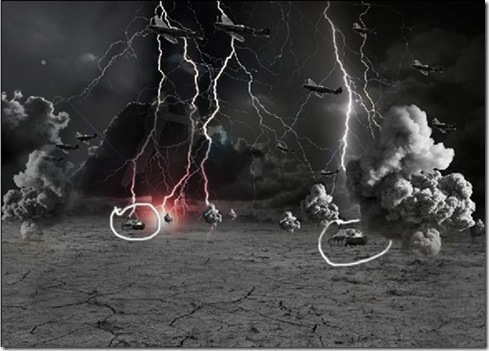
Create new layer, add some tanks in war field,used this image from sxc.hu.the image default in black/white so its easy to edit them and plce as you like.duplicate once. Name it”tank1”
Step:8
Now create another layer,name it and plce a snipper in left side of the layer.[/*image src I don’t know,i took it from other language blog.if u know tell me*/]the Link snipper. Use the layer mask method
Step:9
Here comes our hero,i looked many free image sites,and atlast i found our hero.
Use pen tool to extract the hero and put him in the centre,before that desaturate it.
You can also add some filter Gallery” so i used under Filter-> Fliter gallery-> Artistic->PosterEdges effects. The Value are : 2-1-2.
Step:10
Place more missionary one in right major tank. Now everything over,its time to add text to poster.
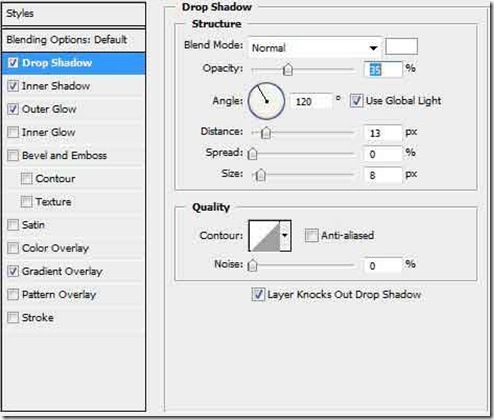
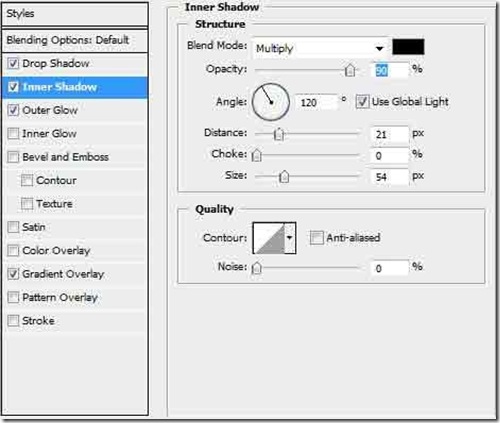
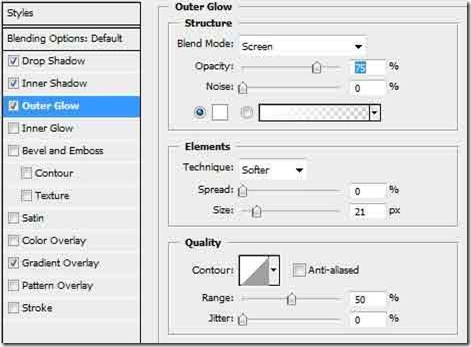
Here used some grunge type fonts” Destroy”,you can use own. With the type tool(T) type “ WAR” and double click on the layer to open blending mode option. The values are.
Drop Shadow
Inner shadow
Outer glow
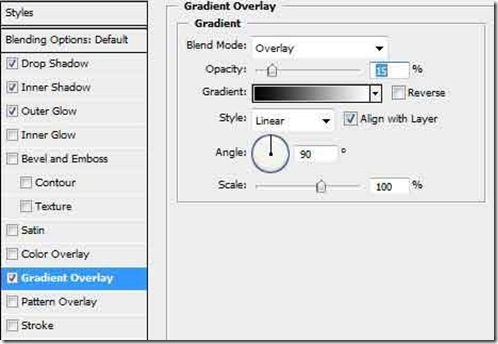
Gradient Overlay
Now duplicate once and raterize it by Rt-clicking on the text layer and select rasterize.
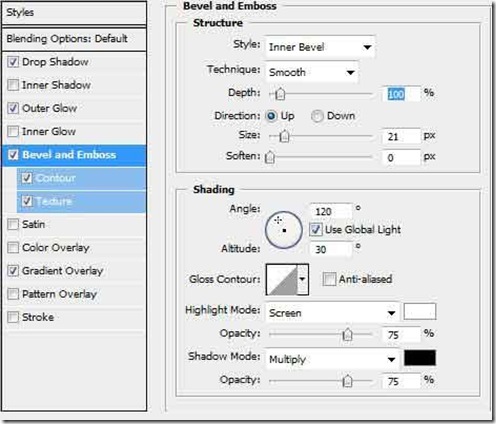
Now add one more blending option to the previous one” bevel and emboss” the contour and Texture option varies upon your font.i add some more text like summer,5 and paragraph
Bevel and emboss
Step:11(optional)
How about add some rain effect to the poster,it looks really nice.
Create new layer and fill with white color now goto Filter-> Noise-> Add noise. The value : amount-90%, Distribution :gauusian and check monochromatic.
Then goto Filter->blur-> Motion Blur.now choose Angle and Distance accordingly.
Next step change the blending mode of the rain layer to “ SCREEN”, now Under image->adjustments->Levels(Ctrl+L).
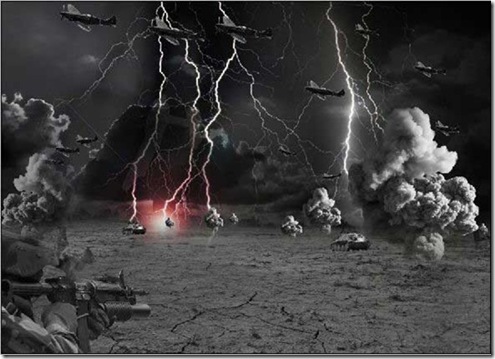
And give corresponding values 200.0, 2.0, 256.0 and output levels is 0-255,channel RGB. So our final Poster image : High Resoultion:
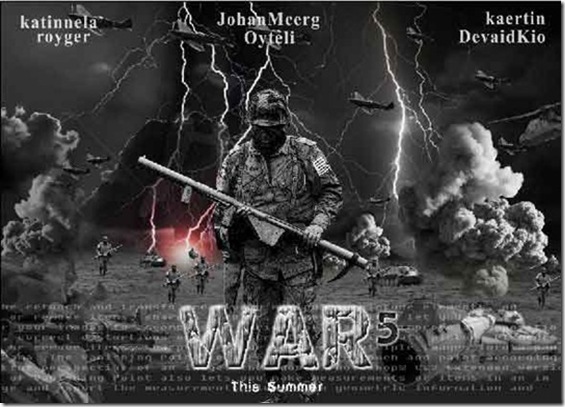
Final: War poster without RAIN effect !!
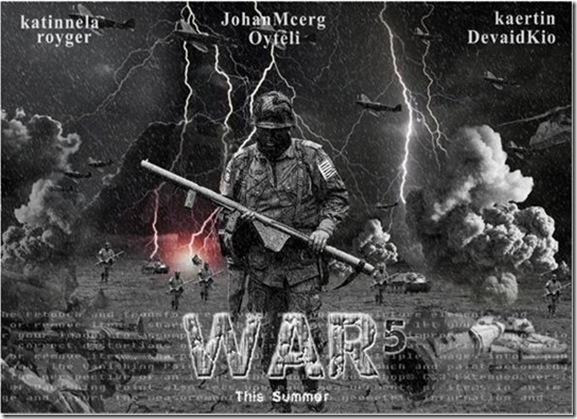
Final :war poster with Rain EFFECT



nice tutorial,and looks clean 😎 ,the theme is also good, where did u downloaded or its a premium one 😈
😆 hey its a premium theme from elegant themes, they have many themes like it, check their site. u can asure u u can buy it.
thanks for the recommend, i have buyed the subscrption
😥 | i cant do, can u help in this. the thunder image editing. please 😳
ya i will, what doubt you really have in that, its a already edited image. i made it easy for u all to save time. evrything here is i saturated. or ucan black nad white if u have cs3 or above 🙂
thanks for the clearing the doubt
nice one and huge tutorial , its high resolution. can we take print for posting in my room( personal use) 😕
you should check their cc license and copyrights before using. each image varies from different 🙂 , thanks for adding 😎
nice and u made a simple way to understand this. tutorial, y koin lays cant understand 😯
i can understand now
thanks for sharing. looking more from you. little confused @ first 😈
if u have doubts 😕 ask me , i am here to tell you
same here @ first ➡
now u clear now,
dai nala eruku da. , i can laod the image, i have using through mobile net, very slow 🙁
🙂 subscribe to rss to get the full post.
nala panra man. uanku odampu pora moolai : 🙄
yes you are correct
🙄 dai unaku eruku da.
This is very amazing tutor but it not a beginners level but still very good .
thanks 4 comment.i like ur blog . can u join in gtalk.
Thanks for the commenting ➡
nice tuts da brother
.-= jothi´s last blog ..Key Elements to Blog Visibility =-.
Thanks akka, 😳
Thanks for sharing this step by step tutorial. Very helpful and I’ve learned photoshop easily.
thanks for posting comment. yours welcome
nice post,and tutus.
thnaks
nice and clean tutorial
i was shocked u like it 🙂
nice tutorial and thanks for sharing. looking more from you , keep posting. 🙂
sure i will post new tutorials , freebies and esp icons, i found how to make in icon format
nice tutorial by the way, like it.
your welcome
I have no clue about PS. Hey the picture looks awesome, I want to create a cool 125×125 banner of my website(animated gif image). How can i start or what tool is needed?
Ricky thanks for the comment, dude. u can use Photoshop version form cs to cs4. the cs4 is advanced and powerful. the cs3 is good. i use it, cs4 ( my system is old one) ,so i dont use it.but u can. if u like , i can make it,if u want .
That will be great. Let me know what and all requirements are needed or any suggestion from your side.
a good tutorial adn thanks for sharing.
simple and great tutorial by the way, why u made this one in b/w, can u give us color image
good one. keep it up
just subscribed
confused @ step 5 help me 😕
your blog is good
.-= Kelvin´s last blog ..Mac OS X Snow Leopard an Editors’ Choice =-.
Can you provide more information on similar issues, or do you have some resources you can share where i can read more about such stuff?
Excellent Tutorial Bro. Although I don’t have much experience with photoshop, I think i can get this posted using this tutorial. Useful post.
Hey I love the pic with the lady flying the hind. Can you tell me where to find it or send me a copy? Just for my personal collection, I’m a super fan of the Hind.
Thanks much.